Create custom cookie cutter STL files online
CutterForge focuses on the practical file you need at the end: a custom STL for 3D printing. Start from the right source, preview the cutter, and export a file that your slicer can open.
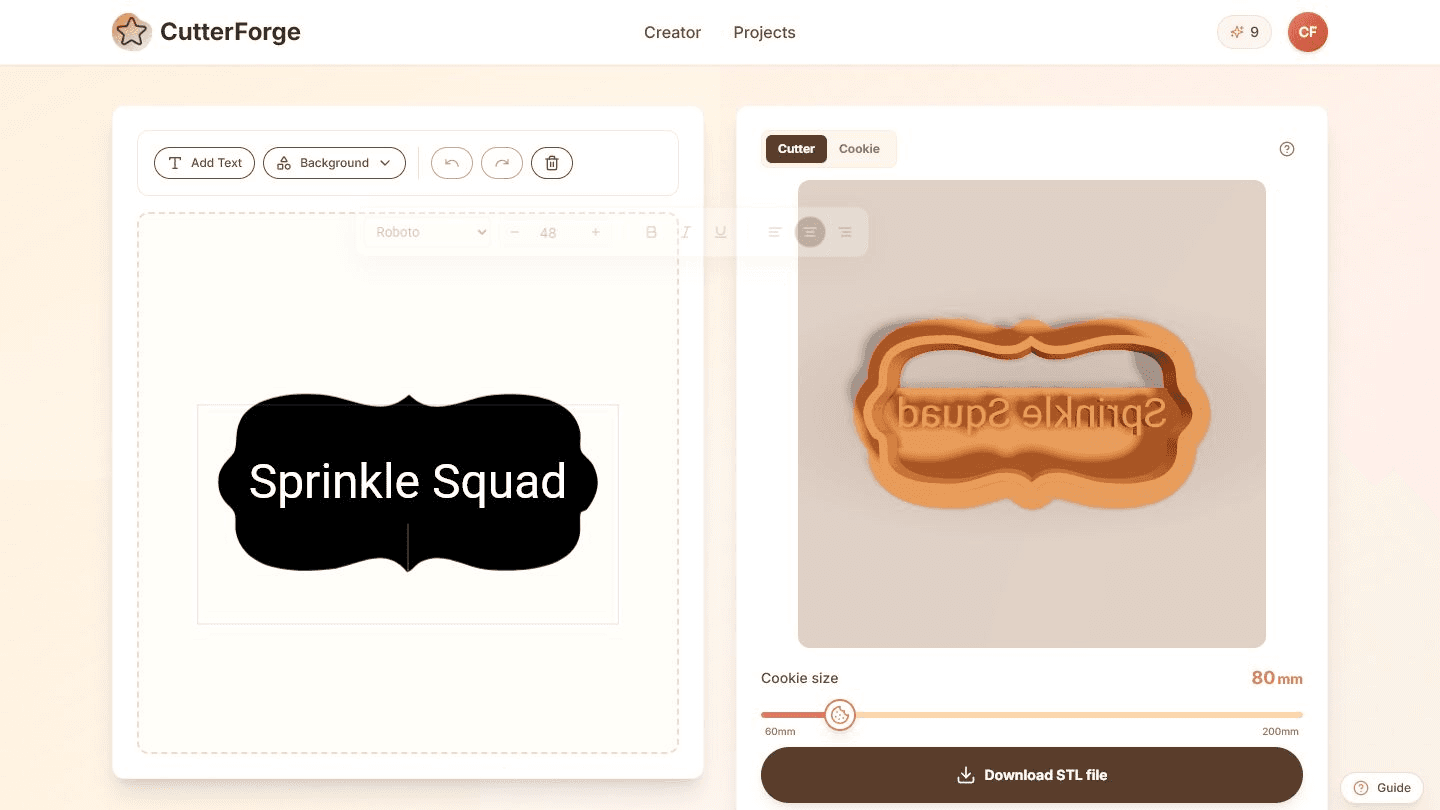
Built for the real path from idea to cookie cutter.
The page is built around getting from a design source to a downloadable STL, not just creating a flat graphic.
A custom STL should always be checked for scale, wall continuity, and small details inside your slicer.
Use the same export mindset whether your source is a logo, photo, prompt, text phrase, or simple image.
Four steps, then a file you can print.
- 01
Choose AI, image, photo, logo, or text as the source.
- 02
Generate and preview the cutter geometry.
- 03
Set the cookie size and review wall strength.
- 04
Download the STL and slice it for your printer.
Useful for more than one shape.
What this workflow produces
Example input
A bakery logo, pet photo, AI prompt, or name typed into the editor.
Example output
A custom cookie cutter STL file suitable for slicer setup and FDM printing.
Export details before you print
Files you get
- Custom STL cutter
- Project thumbnail
- Saved editable project
Inputs supported
- PNG
- JPG
- Photos
- Text
- AI prompts
- Logo artwork
Slicers and printers
STL exports can be prepared in Bambu Studio, PrusaSlicer, OrcaSlicer, Ultimaker Cura and similar slicers for printers such as Bambu Lab, Prusa, Creality, Anycubic, Elegoo.
For most custom cutters, start at 0.8-1.2 mm; use thicker walls for large or heavily detailed cutters.
Printing tips
- Use 2-4 perimeters depending on nozzle and slicer settings.
- Choose a layer height that keeps the cutting edge clean.
- Wash and handle prints according to your food-contact workflow.
Limitations to know
- CutterForge exports STL, not printer-specific G-code.
- Slicer settings still determine print strength and surface finish.
- Some complex artwork needs simplification before it becomes a practical cutter.
AI, image upload, or text mode?
Use AI when
Use AI for original ideas before STL generation.
Use image upload when
Use image upload for existing artwork or logo sources.
Use text mode when
Use text mode for editable typographic STL cutters.
Avoid weak cutter files
Downloading an STL and skipping slicer inspection.
Using the same wall thickness for every cutter size.
Expecting STL export to include slicer-specific print settings.
Using artwork with disconnected details that do not create useful cutter features.
Common questions
Does CutterForge create STL files?
Yes. The main export for cutter designs is an STL file for use in a slicer.
Is STL the same as G-code?
No. STL is the model file. Your slicer turns the STL into printer-specific G-code.
Which slicers can open the STL?
Bambu Studio, PrusaSlicer, OrcaSlicer, Cura, and other common slicers can open STL files.
What wall thickness should I choose?
Start around 0.8-1.2 mm and adjust based on cutter size, detail level, nozzle, and material.
Can I make commercial STL files?
You are responsible for rights, marketplace rules, and product safety claims if you sell files or printed cutters.
Can I edit the STL after export?
You can edit STL files in external CAD or mesh tools, but it is usually easier to adjust the source project before export.