Turn SVG-style artwork into a cookie cutter STL
If your artwork starts as SVG, the best path is to export a clean high-contrast PNG and use CutterForge’s image workflow. Keep the vector simple, avoid tiny details, and export an STL after preview.
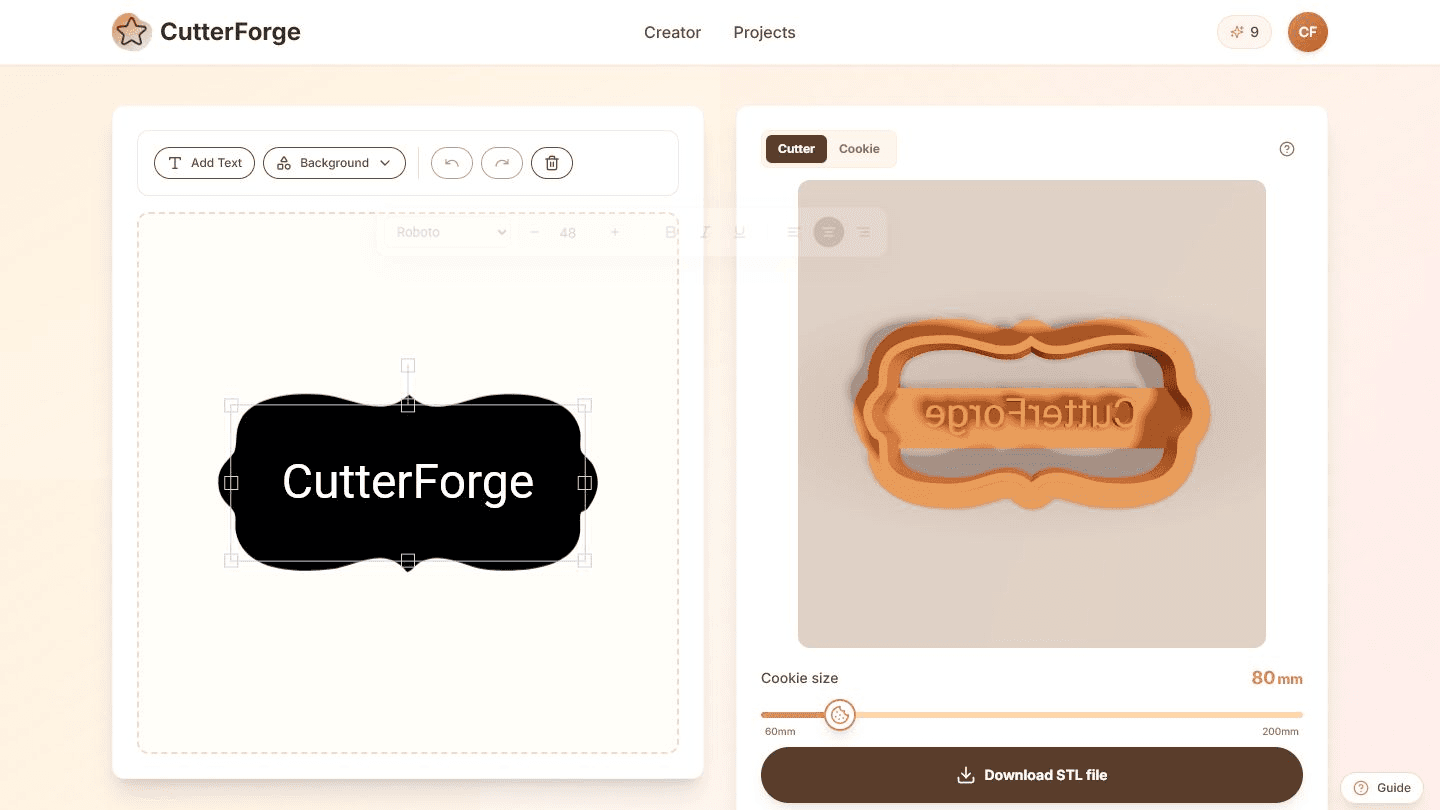
Built for the real path from idea to cookie cutter.
Vectors are often precise, but cookie cutters need durable walls. Remove tiny paths, text fragments, and decorative lines before conversion.
A high-resolution PNG from your SVG gives the image workflow a clear source while avoiding browser-specific SVG rendering issues.
Even clean vectors can contain details that are too small for dough or FDM printing, so slicer preview remains required.
Four steps, then a file you can print.
- 01
Simplify the SVG to one clear shape or mark.
- 02
Export a high-resolution PNG with strong contrast.
- 03
Upload the PNG to CutterForge and preview the cutter.
- 04
Download the STL and check it in your slicer.
Useful for more than one shape.
What this workflow produces
Example input
A simplified SVG icon exported as a 2000 px black PNG on a transparent or white background.
Example output
An STL cutter following the vector silhouette, with small vector details removed or simplified.
Export details before you print
Files you get
- STL cutter
- Project thumbnail
- Saved project state
Inputs supported
- PNG exported from SVG
- High-resolution JPG
- Simple vector-style icons
- Line art
Slicers and printers
STL exports can be prepared in Bambu Studio, PrusaSlicer, OrcaSlicer, Ultimaker Cura and similar slicers for printers such as Bambu Lab, Prusa, Creality, Anycubic, Elegoo.
Use 0.8-1.2 mm for simple vector silhouettes; increase if the SVG has tight angles or narrow connections.
Printing tips
- Expand strokes before exporting from vector software.
- Remove tiny paths that cannot become useful cutter details.
- Export at high resolution to avoid jagged conversion.
Limitations to know
- Direct SVG upload is not the primary workflow; export a clean PNG first.
- Thin vector strokes may be too fragile for physical cutters.
- Text in SVG should be converted to practical shapes or handled in the text tool.
AI, image upload, or text mode?
Use AI when
Use AI if you need a new icon concept before vector cleanup.
Use image upload when
Use image upload after exporting your SVG as a clean high-resolution PNG.
Use text mode when
Use text mode when the SVG is mostly words and should remain editable.
Avoid weak cutter files
Uploading a low-resolution export from an otherwise clean SVG.
Leaving hairline vector strokes in the design.
Keeping many separate tiny paths that become weak cutter details.
Forgetting to expand strokes before raster export.
Common questions
Can I upload SVG directly?
The recommended workflow is to export your SVG as a clean high-resolution PNG, then use image upload.
What SVG export settings work best?
Export a large, high-contrast PNG with expanded strokes, no background clutter, and no tiny decorative paths.
Should I keep text as SVG paths?
Only if it is bold and simple. For editable names and phrases, the text tool is usually better.
Will vector precision improve the cutter?
Clean vectors can help, but physical cutter quality still depends on wall thickness, scale, and printer settings.
Can I convert a logo SVG?
Yes, if you have rights to use it and simplify it enough for cutter geometry.
What output do I get?
You export an STL file for your slicer after converting the rasterized vector artwork.