Generate cookie cutters for 3D printing
CutterForge helps makers move from idea to 3D printed cutter. Create the design online, export an STL, and prepare the print in the slicer you already use.
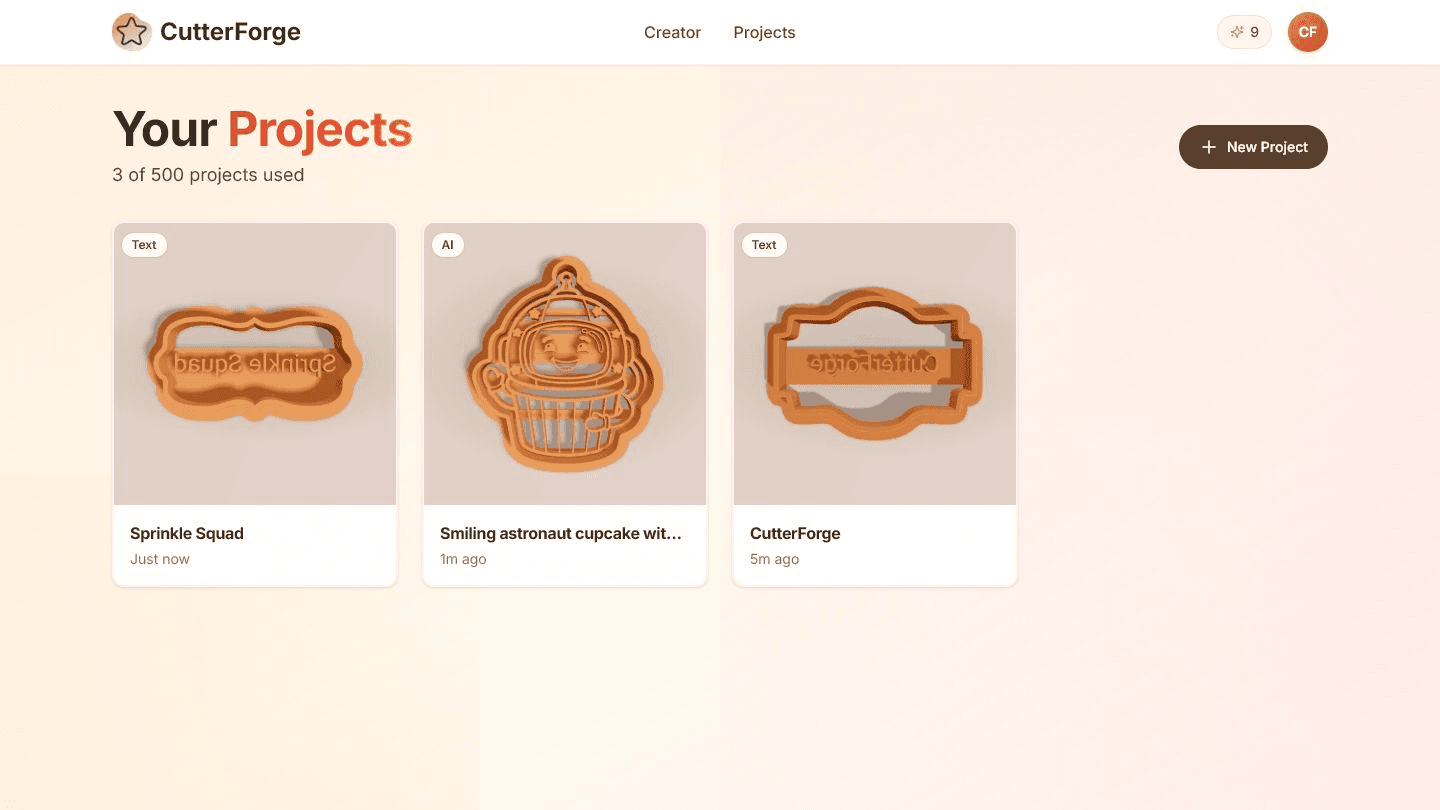
Built for the real path from idea to cookie cutter.
CutterForge exports STL so you can control nozzle, wall count, material, layer height, and G-code in your own slicer.
The workflow emphasizes wall thickness, simplified shapes, and previews that make sense for FDM printing.
Create variations online, then test scale and strength in your slicer before committing to a batch.
Four steps, then a file you can print.
- 01
Create or upload the cutter design source.
- 02
Preview geometry before export.
- 03
Download the STL model.
- 04
Slice with print settings for your printer and material.
Useful for more than one shape.
What this workflow produces
Example input
A simple AI prompt, clean image, logo, or text label intended for FDM printing.
Example output
A 3D printable STL cutter that can be sliced with perimeters and material settings you control.
Export details before you print
Files you get
- STL model
- Project preview
- Saved project state
Inputs supported
- AI prompts
- PNG
- JPG
- Photos
- Text
- Logos
Slicers and printers
STL exports can be prepared in Bambu Studio, PrusaSlicer, OrcaSlicer, Ultimaker Cura and similar slicers for printers such as Bambu Lab, Prusa, Creality, Anycubic, Elegoo.
0.8-1.2 mm is a practical starting point for many FDM cookie cutters; increase for strength or larger designs.
Printing tips
- Use enough perimeters to make the cutting wall solid.
- Check first-layer adhesion for thin walls.
- Avoid scaling detailed cutters below your nozzle’s practical resolution.
Limitations to know
- CutterForge does not choose printer-specific temperature or speed settings.
- Food-contact safety depends on material, printer cleanliness, and post-processing.
- Highly detailed sources may need simplification for reliable printing.
AI, image upload, or text mode?
Use AI when
Use AI for new themes and fast concept generation.
Use image upload when
Use image upload for existing icons, drawings, and logos.
Use text mode when
Use text mode for names and labels where readability matters.
Avoid weak cutter files
Treating the STL as ready-to-print without checking slicer preview.
Using too few perimeters for the cutter wall.
Printing very thin walls with brittle settings.
Ignoring material and cleaning considerations for food-adjacent use.
Common questions
Can I 3D print the exported file?
Yes. Export the STL, open it in your slicer, choose printer settings, and generate G-code.
Does CutterForge include slicer settings?
No. CutterForge creates the STL; your slicer controls nozzle, material, perimeters, supports, and G-code.
Do cookie cutters need supports?
Most simple cutter walls do not need supports, but always check your slicer preview for overhangs or unusual details.
What printer type is best?
Most users print cookie cutters on FDM printers because STL files are easy to slice and the shapes are wall-based.
What layer height should I use?
Use normal slicer judgment. A moderate layer height can work well, but thinner layers may improve edge finish.
Is a 3D printed cookie cutter food safe?
Food safety depends on filament, printer cleanliness, surface finish, and local guidance. Do not assume every print is food safe.